12th February, 2019
Here is the second installment of local Photographer Rachel Piper’s tips on taking great photos.
Framing and Composition
There are ‘rules’ when it comes to framing and composition, which I will explain, but I believe that rules are made to be broken! My personal view is that you should look at everything in your frame, not just the subject but the clutter as well, and decide if you like what you see. Move if you need to. I love taking photographs from unconventional angles, so try lying on the ground, pointing your camera up to the sky or just showing a hint of your subject. And now for those rules…!
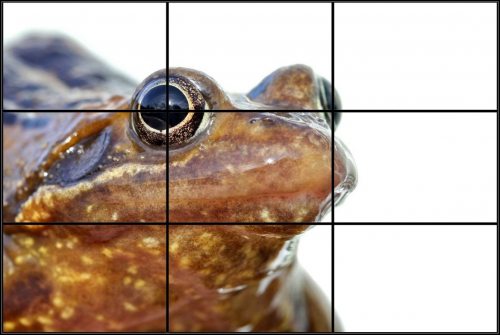
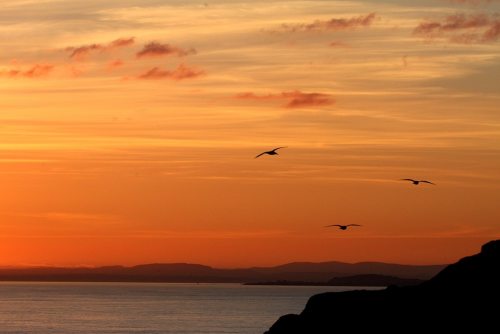
The Rule of Thirds is perhaps the most well-known ‘rule’ when it comes to composing a photograph, so imagine an image broken down into thirds (both horizontally and vertically) so that it consists of nine parts. The theory is that if you place points of interest in the intersections or along the lines your photo will become more balanced and encourage more interaction with the subject. Here is an example of where I have used the rule of thirds and one where I haven’t!
My main rule is to enjoy taking your photographs!
Lighting
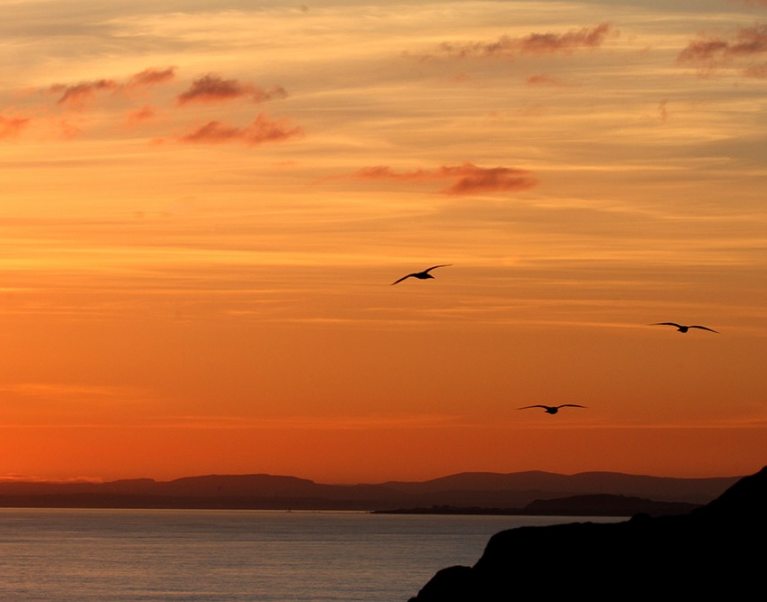
Before you take your image do stop and think about the lighting and ask yourself how it will affect the outcome. In many cases you can use natural light to your advantage. I love the softness of morning and evening light, but the shadows produced by the midday sun can be very dramatic. Don’t avoid going out when the weather is overcast or you might miss out on some dramatic images, and it is usually easier to take photographs when the sun isn’t shining brightly. You can, if required, change the exposure settings on your camera, but my first piece of advice would be to move if the lighting conditions aren’t right, particularly if you can shoot without strong sunlight. Here, I am pointing my camera towards the sun, so my image is underexposed. This is because my camera is metering the overall light and thinks it’s a lot brighter than it is. If you have no choice then manually change your exposure to allow more or less light into the camera.
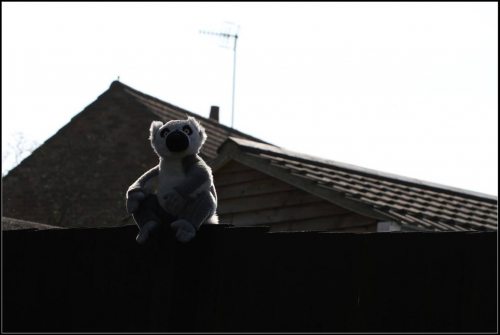
In this photo, as the sun is behind me, there is a lot of contrast. The camera is struggling to cope with the range from light to dark, so detail in the face is lost. In advanced photography there are ways of dealing with these issues, but my suggestion would once again be move to the shade if you can. Also, don’t be afraid to get up close and personal. One common ‘error’ is to stand too far away from your subject. If you are taking a portrait it’s better to zoom in (if you have an optical zoom) rather than go right up to people, as this minimises the distortion (and they feel more relaxed!).

Post-Production
Some people think that you should be able to do everything in the camera, but I didn’t in my darkroom days and I don’t now! I use Photoshop, mostly to adjust the brightness, contrast, tonal range of an image, and to crop if required. You don’t need Photoshop, but you might want to invest in something if you want to improve your photographs. Cameras often come with a basic editor, but if not, you can purchase something like Photoshop Elements very cheaply or download a freebie, such as the Gimp.
Happy Shooting!
To view Rachel Piper’s photographs please visit her website
As lovers of the great outdoors both Rachel and the team here at The Carter Company, would like to support the Woodland Trust, the UK’s leading woodland charity, and we have therefore made a donation on Rachel’s behalf to thank her for her time and advice.